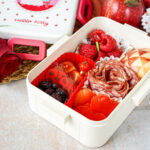
Red Bento Box
A recipe for a Red Bento Box from the cookbook, Fresh Bento! This red-themed lunch is packed with salami, fresh raspberries, cherry tomatoes, dried cranberries, red bell peppers, and a decorated apple.
Servings 1 Lunchbox
Ingredients
- raspberries
- dried cranberries
- beet chips (I did not have enough room in my box for them)
- sliced salami
- grape/cherry tomatoes
- red bell pepper
- red apple
Instructions
- Place raspberries in one of the medium sections of the bento box. Top with a red robot (or other red pick) decoration.
- Add cranberries to the smallest compartment.
- Place a red cup in the corner of the largest compartment of the lunch box. Fill with beet chips (I personally did not have room for this).
- Fold salami slices in half, and then into quarters. Add them to the remaining red cup with the point side down until the cup is full. The salami should have a ruffled appearance. Add the cup to the large compartment of the lunch box, opposite the chips.
- Thread a few tomatoes onto the decorative crayon (or other red) pick. Fill one of the empty spaces in the large section of the bento box with some more tomatoes and then top with the pick.
- Cut a large slice off the side of the red pepper. Use a small heart-shaped cutter to make two or three heart shapes. Chop the rest of the pepper into bite-sized pieces and fill the rest of the empty space in the large section of the bento box. Add the heart-shaped pieces on top.
- Cut a large piece off the side of the apple, then trim it to fit into the remaining empty compartment in the lunch box. Use a small sharp paring knife or craft knife to score the skin of the apple into a triangle pattern. Be careful that you don't cut too far down into the flesh of the apple! Your goal should be to only cut through the skin.
- Gently slide the tip of the knife under one of the triangles you've cut into the apple's skin. Keep the knife parallel to the flesh of the apple as much as possible and slide it around the edges of the triangle until the skin pops off. Continue removing every other triangle of skin from the apple until the entire surface is covered with the pattern. If brown apples bother you or your child, sprinkle a bit of Fruit Fresh powder on the top of your design to preserve the white color.
- Cut some more slices of apple and place at the bottom of the apple compartment. Top with the decorated piece of apple.