


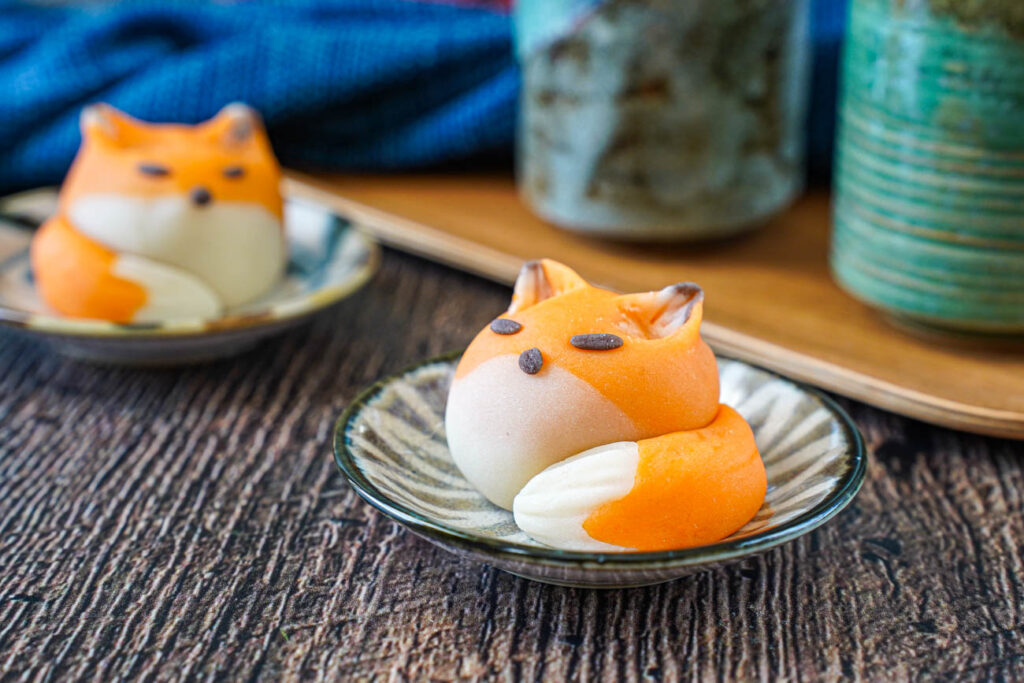
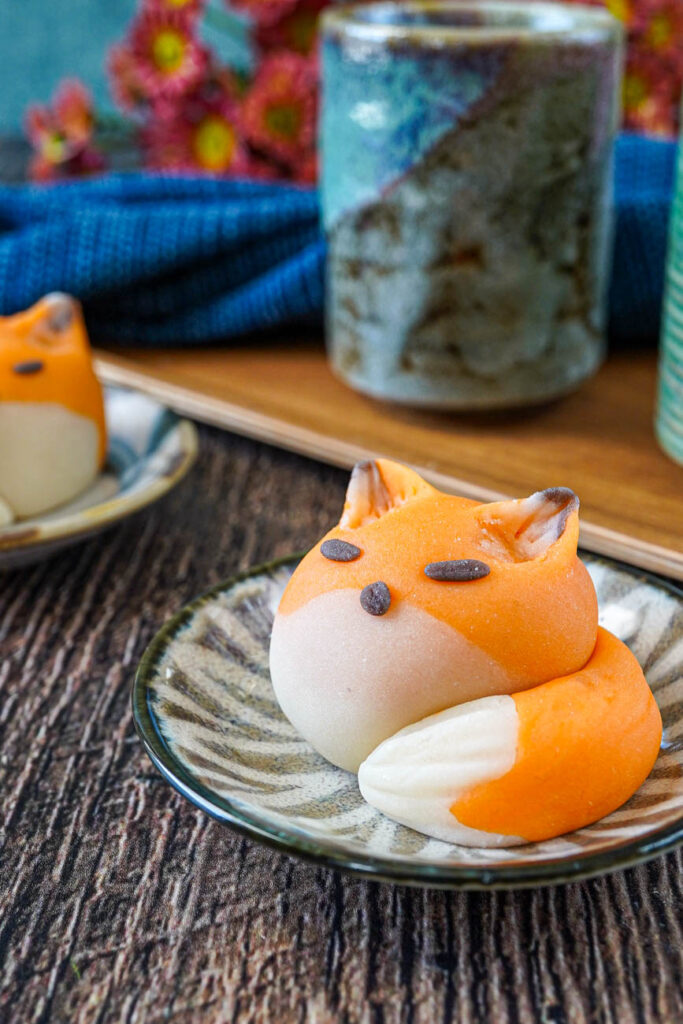
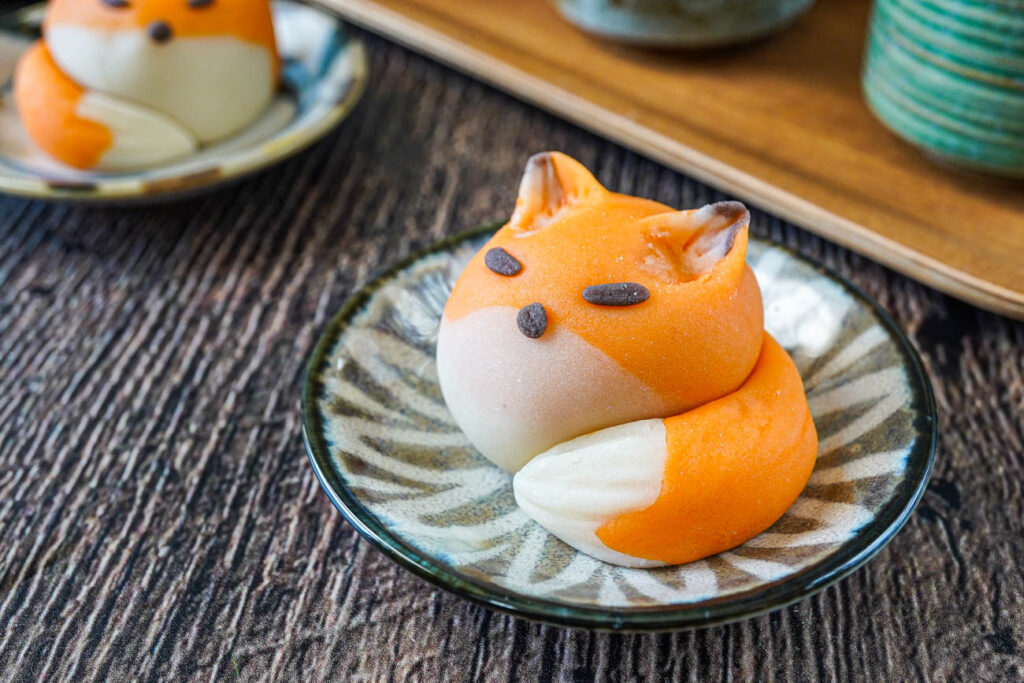
A recipe for Fox Nerikiri inspired by our time in Kyoto, Japan! This fox-shaped wagashi is filled with a smooth red bean paste and perfect for pairing with tea.
Over the summer, we were in Japan for a couple of weeks spending time with friends and trying all the incredible food.
I will be covering our travels in a series of posts along with recipes inspired by our experiences. Today, I am sharing our time in the area of Kyoto south of Kyoto Station and a recipe for Fox Nerikiri.
Check out the rest of our travels:
- Matcha Scones and Asakusa, Tokyo
- Chocolate Nama Yatsuhashi and Kyoto Station
- Iced Matcha Espresso Latte and Kyoto
Kyoto
During this trip to Japan, we visited Kyoto for the first time!
Located in the Kansai region, Kyoto (京都) was the capital of Japan from 794 to 1868 and is now home to a beautiful blend of historical buildings and modern architecture along with fantastic food, cultural experiences, and 17 UNESCO World Heritage Sites.
The city is also a great base for day trips to nearby areas such as Osaka, Nara, Uji, Kobe, and more.
We spent six days in Kyoto (with one day in Universal Studios Osaka), but it wasn’t nearly enough time for our relaxed pace. We could have easily stayed longer to see more of the city. For highlights, I recommend at least 3 days.

It was hot during the last week of June and first week of July (with an abnormal lack of rain), averaging around 95-100˚F (35-38˚C) and an even higher heat index due to the humidity. This kept our pace a little slower.
We planned our shrine and temple visits for early morning and generally spent the afternoons indoors. We also used UV umbrellas, hand fans, cooling wipes, and lots of Pocari Sweat (ポカリスエット).
Getting to Kyoto

We arrived in Kyoto via the Tokaido Shinkansen (東海道新幹線) from Shinagawa Station (品川駅, you can also board in Tokyo Station) in Tokyo to Kyoto Station (京都駅).
I booked tickets with seat reservations (highly recommended, especially if not solo and during peak travel days/holidays) using the smartEX App (available in English) and it was easy to have the QR codes on my phone to scan through the gates without any extra steps, lines, or ticket machines.
As a note, the app is only available at the time of this post (2025) to book routes for the Tokaido, Sanyo, and Kyushu Shinkansen lines.
There are three types of Shinkansen on this track from fastest to slowest: Nozomi (limited stops- a little over 2 hours), Hikari (a few more stops, about 2 1/2 hours), and Kodama (stops at all the stations along the line, 3 1/2 hours).
From Shin-Osaka Station (新大阪駅), the Tokaido-Sanyo Line takes about 30 minutes to reach Kyoto Station.
From Kansai International Airport (関西国際空港, KIX), Kyoto Station is about 70 minutes via the JR Haruka Limited Express or 1 1/2 hours via the Limousine Bus.
For most of the areas featured in this post, I either walked from Kyoto Station, took the bus, or took the subway (Karasuma Line, 烏丸線).
Mimaru Kyoto Station
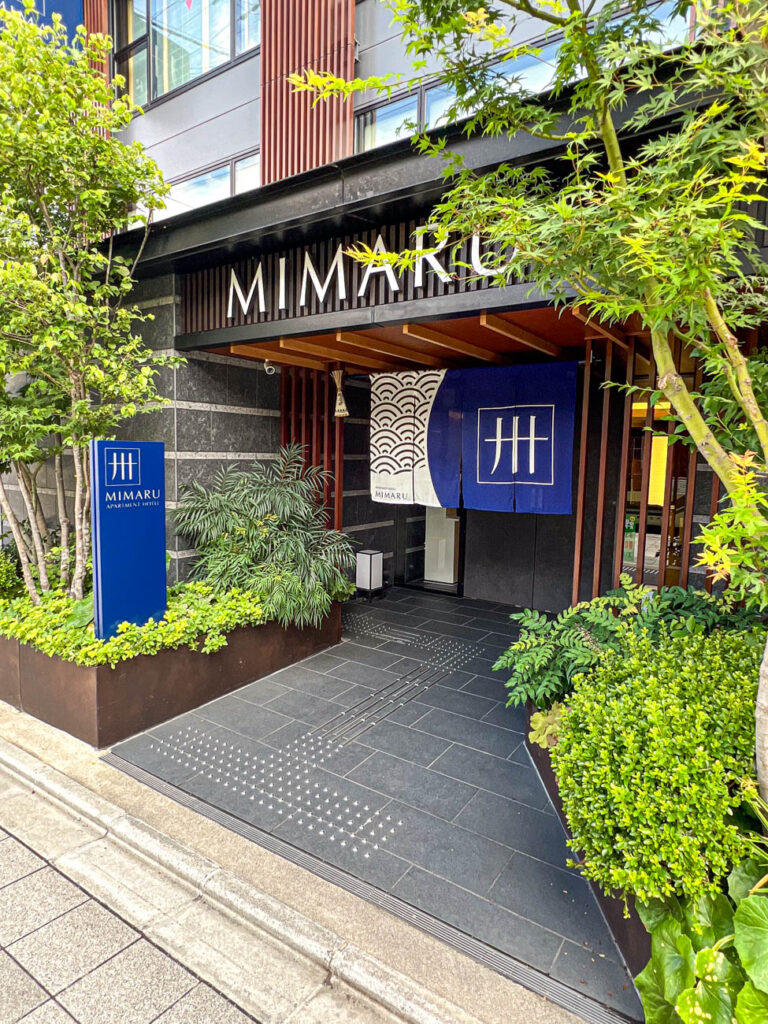
While looking for family-friendly hotels, we ultimately booked Mimaru Kyoto Station (15-1 Higashikujo Higashisanno-cho) just across the street (south) of Kyoto Station. The location was perfect for navigating in and out Kyoto Station with our luggage and having easy access to restaurants/shopping.
Mimaru is a Japanese apartment-style hotel chain with locations across Tokyo, Kyoto, and Osaka. They feature standard and themed rooms for smaller families (or larger ones if you stay in a suite).
Reception is located on the ground floor with front desk service between 7 am and 10 pm. At the time of this post, check-in is after 3 pm and check-out is by 11 am.
The staff spoke both Japanese and English and were incredibly helpful during our stay. They were excited to offer recommendations for the area, can assist with luggage forwarding, and have items available to rent at no charge including amenities, additional kitchenware, and board games.

I booked a 40 m2 (431 sq ft) City View Family Apartment with a kitchen, dining table, two single beds pushed together, bunk beds, television (which we actually never turned on), and a Japanese-style bathroom with separate rooms for the toilet and shower/bath.
We used the kitchen as a way to enjoy more of the microwavable and frozen items from the nearby convenience stores. It was fully stocked with a refrigerator, freezer, microwave, stove, sink, glassware, cutlery, and dishes.
The view from our room was perfect for train lovers. From our window on the ninth floor, we were able to see mountains in the distance and the train tracks coming from Kyoto Station. The kids enjoyed watching the various themed trains and Shinkansen from their bunk beds.

Another bonus was the coin-operated laundry machines (detergent included) on the ground floor. We packed carry-on only on the way to Japan with about six sets of clothing each for two weeks and two empty, folded up duffle bags.
We used the laundry fairly often (especially with the summer heat) to get us through our stay, then used the extra duffle bags to hold the clothing on the way back home with snacks and souvenirs packed in our carry-on suitcases.
Konbini

There were a handful of Konbini (コンビニ, convenience stores) surrounding our hotel.
We often stopped by the 7-Eleven just around the corner at 14-1 Higashikujo Higashisanno-cho for small snacks, drinks, and the ATM.
One day, I picked up some Sukeroku Sushi (助六寿司, a combination of Inari Sushi and Maki Sushi) for a light and refreshing lunch on a particularly hot day.

A little further down the street is a Lawson at 11 Higashikujo Nishisanno-cho. I loved the assortment of onigiri here (with the Grilled Japanese Beef Kalbi being my favorite).
Fushimi Inari Taisha

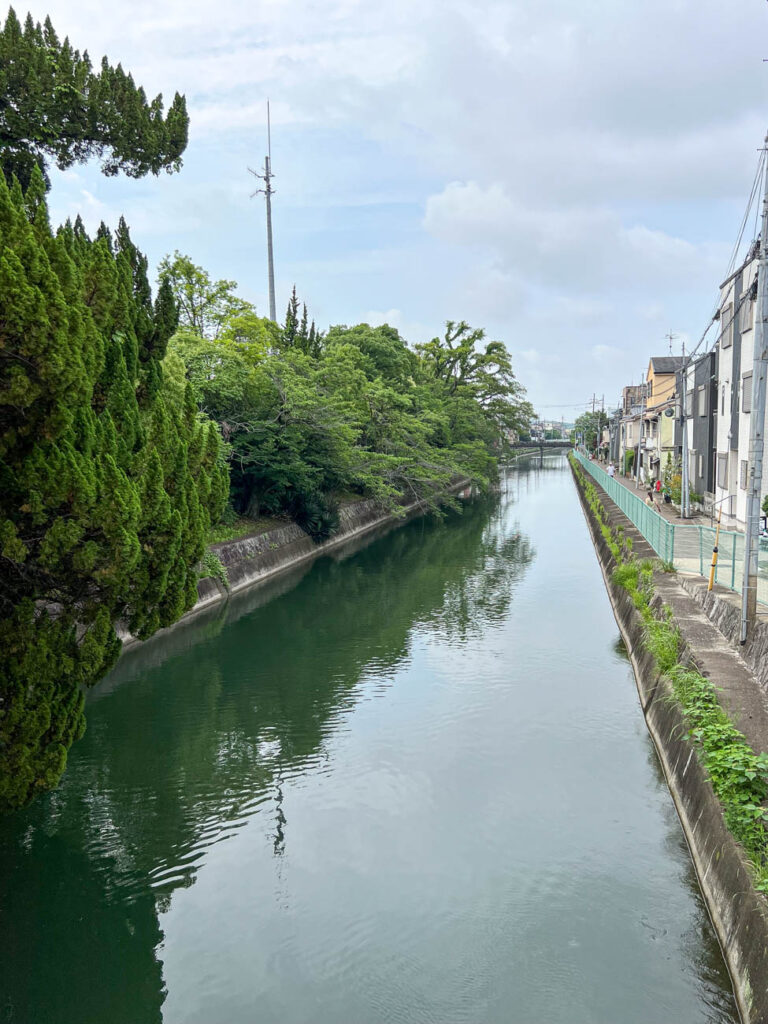
Located in Fushimi Ward (伏見区) about 5 minutes (2 stops) south of Kyoto Station on the JR Nara Line is Fushimi Inari Taisha (伏見稲荷大社).
This shrine was established in 711 AD (actually predating the move of the Japanese capital to Kyoto in 794) and is the head shrine of Kami Inari. It is one of the most photographed areas of Kyoto with its Senbon Torii (thousands of vibrant, vermillion gates).

The main entrance is directly across the street of Inari Station (稲荷駅) and the Torii-lined paths loop up through a forest on Inariyama (Mount Inari).
These Torii have been donated to the shrine by individuals and businesses since the 1600s and continue today. You can see the inscription of the donor’s name and the date on the back side of each gate.

Fox statues can also be found across the area. In Shinto, foxes (Kitsune) are known for being messengers to Inari Okami.

Keep an eye on your surroundings as you go further along the path. I never saw monkeys, but did come signs warning of aggressive families in the area. There may also be wild boars.

I arrived around 7 in the morning on a weekday. There were only a few people and the occasional tripod set up right in the center of the path (please be mindful of others and don’t block walking areas). As I was leaving around 9:30, the area was much more crowded- especially towards the beginning of the path.
I didn’t walk all the way through, but spent about 2 hours at a relaxed pace. Allow for around 2-3 hours if you will be walking the full 4.5 kilometer (2.8 mile) loop.

Be sure to wear mosquito repellent from spring to fall. We forgot to apply it during a visit back later in the week and ended up with quite a few bites within a short period of time.
If you do get bit, the pharmacies inside Kyoto Station carry Muhi (ムヒ) S and patches which can help with the itching.
Vermillion- espresso bar & info
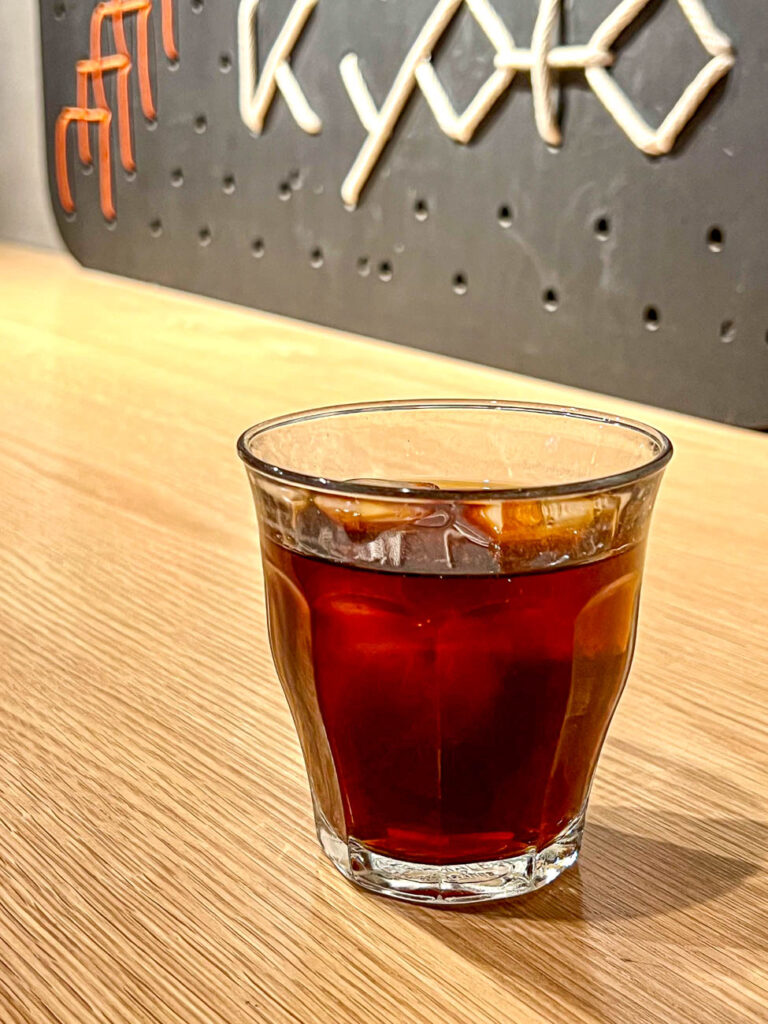
Before heading back to Kyoto Station, I stopped by Vermillion- espresso bar & info for a cup of coffee. Named after the color of the notable torii, this small cafe at 85 Fukakusa Inarionmaecho is open for breakfast and lunch from Monday to Saturday.
Their menu focuses on coffee, tea, a handful of food items, and pastries for takeout or to enjoy inside. The Cold Brew (水出しコーヒー) was especially refreshing.
Fushimi Inari Soratsuki

Just outside the northern entrance to Fushimi Inari Taisha is a street lined with food stalls and souvenir shops.
My daughter was drawn to the vibrant assortment of strawberry-based treats at Fushimi Inari Soratsuki (伏見稲荷 そらつき). They feature Ichigo Ame (いちご飴, candied strawberries on a stick), Ichigo Daifuku (いちご大福, strawberry mochi), ice cream, and drinks.
Kaka Itoken

I absolutely loved the Kushi Wagashi from Kaka Itoken at 82-2 Fukakusa Inarionmaecho.
Kaka Itoken is a Japanese confectionery shop with branches across Kyoto. Their store (果菓 伊藤軒 伏見稲荷店) just steps from Inari Station and Fushimi Inari Taisha highlights the area with special seasonal skewers, fox-themed treats, drinks, and souvenirs available for eat in or take out.
The design of the Seasonal Kushi Wagashi (Japanese sweet skewer, 季節の串和菓子) changes depending on the time of year. For summer, they were featuring a strawberry with a firework shaped konashi (wagashi with white bean paste), fox-shaped manju with a smooth red bean paste, and an omikuji (fortune) tied at the end.
Nintendo Museum

Even further south in Uji and a much newer addition to the city, the Nintendo Museum (ニンテンドーミュージアム) opened to the public on October 2nd, 2024. It is housed in the former Nintendo Uji Ogura Plant.
This museum covers the history of Nintendo from its beginnings as a playing card company in 1889 to the latest release of the Nintendo Switch 2 across two levels.

This was definitely a highlight of our trip and one of the most difficult to plan for. At the time of our visit (2025), reservations are required well in advance.

The tickets are sold via a randomly selected drawing using a Nintendo account. For our visit at the end of June, I applied for the drawing three months prior in March. In April, I found out I did not get selected.
A few days after the results (for me it was the second Wednesday of the month at 2pm Japan Time), tickets were released from those who did not purchase and I was able to pick a 3pm time slot. You can also check often for any cancelations.
I was worried that 3pm would not give us enough time to see everything before the 7pm closing, but it ended up working out well.

After entering the building, we started on the second floor. This level features released (and never released) games, original artwork, and developments of the company along a timeline. No photography is allowed in this part.
The ground level has a variety of interactive games, consoles, and displays playable via an allotted amount of 10 coins on each person’s non-rechargeable pass. These 10 coins will not cover every single game, so I recommend walking through the area first and narrowing down favorites before playing.
The kids ended up spending most of their coins on Ultra Machine SP. These batting cages are situated in different rooms with balls pitched by an Ultra Machine.

The Nintendo Museum also has a Hanafuda workshop and a gift shop with unique items.
Allow for plenty of time to get to the museum and through security, at least 15 minutes before the scheduled arrival slot.
Visitors are asked to take public transportation. From Kyoto Station, we took the Kintetsu-Kyoto Line 9 stops (about 21 minutes) south to Ogura Station (小倉駅) and walked 500 meters (1/3 mile) to the entrance.
Hatena Burger

While at the museum, we stopped by the on-site Hatena Burger for an early dinner.
Hatena Burger is the themed cafe located inside the Nintendo Museum. They feature customizable and specialty burgers, drinks, a kid’s menu, and desserts in a fun space with artwork and decorations inspired by games such as Animal Crossing and The Legend of Zelda.

If planning on eating at the restaurant, I highly recommend looking at the menu ahead of time.
Ordering is via QR code while in line and we ended up letting a few people go in front of us since it was taking us a couple of minutes longer to narrow down. We decided on the following:
- すきやきバーガー – コマぎれ牛肉、半熟目玉焼き、厚揚げ、九条ネギと甘じょっぱいソースを絡めた、すきやきのようなハンバーガーです。Sukiyaki-like hamburger with shredded beef, soft boiled egg, deep-fried tofu, Kujo green onions, and sweet/salty sauce.
- 親子丼バーガー – フライドチキン、スクランブルエッグ、九条ネギをゆず胡椒だしソースで仕上げた、親子丼のようなハンバーガーです。Chicken and Egg Burger- Fried chicken, scrambled eggs, and Kujo green onions, with citrus pepper dashi sauce.
- キッズバーガーセットともくもくソフト – Kid’s Burger Set and Moku Moku Ice Cream (cloud-shaped soft serve).
- Evan‘s customizable burger with a bunch of patties and cheese.
- グリーンパン(抹茶) – やわらかいパン生地に抹茶クリームを入れたスイーツです。Matcha sweet bread with soft dough and matcha cream center.
Fox Nerikiri
After enjoying the gorgeous Kushi Wagashi at Kaka Itoken, I wanted to try making wagashi (和菓子, confectionery) again at home and decided on Nerikiri.
Nerikiri (練り切り) is a type of wagashi originally from Kyoto. It has a delicate flavor with a blend of shiroan (white bean paste) and a glutinous rice flour dough (Gyūhi) surrounding a red bean filling. This light, sweet flavor is the perfect contrast after drinking tea.
Designs range from subtly decorated pieces to intricate art forms reflecting the surrounding area or seasons. I knew I wouldn’t be able to get this post together in time seasonally for the firework wagashi featured in the skewer, so I opted to go with a fox shape (キツネの練り切り) inspired by our time at Fushimi Inari Taisha and the current autumn season.
The Nerikiri is best enjoyed within a few hours after assembly. It can be refrigerated in an airtight container for up to a couple of days, but the texture will start to become dry.
Notable Ingredients
Shiratamako (白玉粉) is a glutinous rice flour made from Japanese short grain glutinous rice (もち米, mochigome). It has a coarse texture, so I blended it with water to dissolve before adding the sugar.
Koshian (こしあん) is a type of sweet red bean paste with a smooth texture. If you are unable to locate it or want to make your own, Sudachi has a recipe for Homemade Koshian.
For those in the Los Angeles area, I have been both of these items at Mitsuwa or Tokyo Central in Torrance.
For those in Northern Virginia, I have been able to find them at Marufuji in Vienna.
Shiroan (白あん) is a sweet and creamy white bean paste. In the United States, I have only been able to find store-bought Shiroan online at Umami Insider and in person at Nijiya Market in Torrance, California. If you want to make your own, Chopstick Chronicles has a recipe for Homemade Shiroan.
Forming the Dough

The Nerikiri dough can either be prepared on the stovetop or in the microwave. I have included the microwave directions in this recipe as it was personally easier for me to work with.
The most important part is cooking the rice flour mixture and the shiroan (white bean paste) until the moisture has been removed, but not to overcook so much that it completely dries out. Too much moisture and the dough will be too sticky to handle and shape. If the dough is too dry, it may crack while attempting to shape.
For best results, use a scale to weigh the ingredients.
The process of tearing the formed dough into small pieces and kneading back together will help it cool faster and more evenly without becoming dry around the edges.
Be sure to cover any parts of the dough you are not currently using with a slightly damp cloth to keep it from drying out and cracking.
A Few More Fox Nerikiri Tips

To fold the color into the dough, use a light cotton cloth, cheese cloth, or a piece of parchment paper.
For the black details, I actually mixed a little black cocoa powder into the dough. During one of my beginning attempts, I tried black gel color and didn’t love the slight purple tint it gave the dough.
Very slowly add the food coloring (gel or powder), a little at a time using a toothpick, to the dough as you mix it in. You need just enough to color the dough. An excessive amount will create too much moisture causing the dough to become sticky or too strong a color.
For the ears, I very slightly pressed back to stretch the dough using a skewer. When doing this, take care to not cut all the way through to the filling. If desired, you can blend in a little white and black dough to add definition closer to an actual fox ear.
I also used a toothpick to draw lines, adding a little texture to the end of the tail and to the ears.
Fox Nerikiri Recipe
Adapted from 四季の和菓子デザイン帖-123の愛らしいレシピ

Fox Nerikiri
Ingredients
- 6 grams (2 1/2 teaspoons) shiratamako
- 15 milliliters (1 tablespoon) water
- 12 grams (1 tablespoon) granulated sugar
- 150 grams (1/2 cup) shiroan white bean paste
- 45 grams (2 tablespoons) koshian smooth red bean paste
- orange gel or powder food coloring
- black gel food coloring or black cocoa powder
Instructions
- Place the shiratamako in a small, heat-safe bowl.
- Stir in the water until the shiratamako starts to become smooth.
- Stir in the sugar until evenly combined.
- Cover the bowl with plastic wrap and microwave for 30 seconds.
- Carefully remove the bowl and plastic wrap, fold well to combine, cover, and microwave again for 30 seconds.
- The mixture should now be transparent. If not, repeat and microwave for another 30 seconds. Set aside.
- Place the shiroan in another heat-safe bowl and cover with plastic wrap.
- Microwave the shiroan for 1 minute, then carefully remove the bowl, fold to combine, then re-cover and microwave for another 1 minute.
- Fold the shiroan again, cover and microwave for another 30 seconds. The shiroan should become dry and powdery. If the mixture is still too wet, continue this process at 30 second increments.
- Fold the transparent shiratamako mixture into the cooked shiroan until well combined.
- Tear off pieces of the dough about the size of a golf ball and place them on a towel or cheesecloth.
- Allow the pieces to cool for 2 minutes, then bring them back together and knead until smooth.
- Tear apart the pieces again and place them back on the towel to cool for about 2 minutes.
- Repeat this process 1-2 more times until the dough is cooled.
- Divide the dough into three pieces: one about 90 grams, another one 60 grams, and a final smaller ball about 5 grams. Cover the pieces you aren't currently using with a slightly damp towel to keep them from drying out.
- Use a toothpick to add a little of the orange coloring to the largest 90 gram ball of dough. Fold the dough using a light cotton cloth, cheesecloth, or parchment paper until the color is evenly blended, adding a little more as needed to create a light, orange color.
- Divide the orange ball into 4 equal pieces and set aside, covering with the towel.
- Leave the 60 gram ball of dough white and divide into four equal pieces, making sure it does not touch the orange pieces.
- For the smallest 5 gram ball of dough, either fold in a little black food coloring or black cocoa powder. Cover with a cloth.
- Scoop out 15 grams (about 1/2 tablespoon) of koshian and form into a smooth ball. Repeat to make 3 rounds in all.
- Place one orange ball and one white ball side by side on cloth or sheet of parchment and press together lightly.
- Press down on the dough between the parchment until about 1/4 inch (6 millimeters) thick. Gently press together any gaps in the sides to make an even disc with one side orange and one side white.
- Place the circle in your non-dominant hand and put a koshian (red bean) ball in the center of the circle.
- Gently stretch the circle up around the koshian ball to enclose, carefully pinching together the ends to seal. Roll the ball between your hands until smooth.
- Place the ball back on the sheet of parchment with the white side facing down.
- Pull off two tiny pieces of black dough. Roll each piece into a line about the size of a sprinkle. Gently press them on each side of the orange section of the ball about 1/4 inch (6 millimeters) above the white line. These will be the eyes.
- Roll another piece of black dough into a ball and place it on the white and orange line just below the eyes. This will be the nose.
- Gently press a skewer or the thicker end of a chopstick above the eyes to stretch some of the dough into an ear without cutting all the way through to the filling. Gently press along the top of each ear to make a rounded tip. For more detail, you can also add a small amount of white and black dough and draw a few lines with a toothpick for definition.
- Repeat this process with the other two koshian rounds and dough to make three fox bases in all.
- Divide the last ball of orange dough into three equal pieces. Divide the last ball of white dough into three equal pieces.
- Place one round of white dough against a round of orange dough and lightly press together to seal. Roll into a thick rope with a tapered white edge.
- Wrap the rope around one side of a fox base to make a tail, white end towards the front. Gently press along the bottom edge to seal to the body. If desired, use a toothpick to draw lines across the white part of the tail for a little texture.
- Repeat with the remaining two foxes to make three formed Nerikiri.
- These Fox Nerikiri are best shortly after assembly and within a day. Store leftovers in the refrigerator in an airtight container for up to 2 days.
hobby baker Kelly
We would love these; adorable and tasty! My kiddo has been taking Japanese for a few years and really wants to do an exchange program for her first year in college. I have made the red and white bean paste and the smooth bean pastes were definitely my preferred texture. But it sure was a pain to remove all those skins!!
Tara
Making the paste homemade is one of my least favorite things to do 😅. I brought back four bags of white bean paste during our latest trip back to Los Angeles just to be sure I had enough 😆.