

Pies are Awesome: The Definitive Pie Art Book: Step-by-Step Designs for All Occasions, written by Jessica Leigh Clark-Bojin, features an exciting and creative guide for designing pie crusts at home! A few highlights include Pi Pie, Quilt Pie, Snowman Pie, Clock Pie, and Flying Unicorn Pie. I will also be sharing her instructions for a Harvest Tree Pie following the review.
Disclosure: I received a digital copy of this book from Rock Point in exchange for my honest review. All comments and opinions are my own.
Jessica Leigh Clark-Bojin
Jessica Leigh Clark-Bojin is “an experimental baker, pie artist, teacher, author, and industry pie-oneer.” She started creating her pie art in 2016 and now shares her creations with others through guides and tutorials on Instagram.
Her work has been featured on CNN, Food & Wine, People, Food Network, the TODAY Show, People, and more.
Pies Are Awesome
Jessica begins Pies Are Awesome with a little history behind Pie Art (from the fourteenth to eighteenth centuries!) and how she developed a love for this style of decorating.
The book is divided into two parts: The Magic of Pie Art (Techniques) and Making Memories (Projects). The sections and individual pies are listed with page number for easy reference.
As someone with minimal pie experience, I especially appreciate how Jessica has put together such an amazing guide for every step of the process from choosing the dough base, filling, and garnishes to the different types of equipment, supplies, and setting up the work station. All the instructions were so easy to follow and there is such an incredible attention to detail across every page.
You will learn all about how to handle, cut, and color the prepared pie dough, decorate with different types of trim design, and how to fix mistakes with a list of “most common pie fails.”
The end of the book is filled with resources for more help with templates, shopping, techniques, inspiration, and more. I love the focus on community and how Jessica has shared the work of other talented artists and where to follow them on social media.
The photography is also provided by Jessica. She has arranged multiple step-by-step photos and a full-page finished photo of every single pie.
The handful of pie and filling recipes towards the end of the book have measurements Metric and US Customary. Titles are written in English. Each guide has a headnote with background information, personal stories, helpful tips, ideas, and resources.
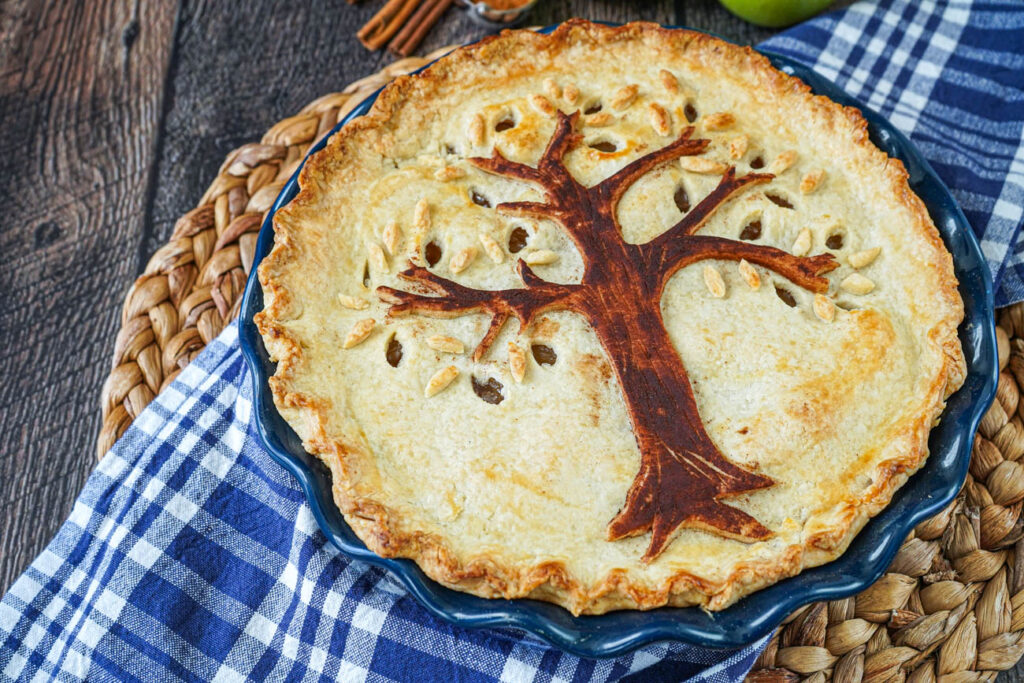
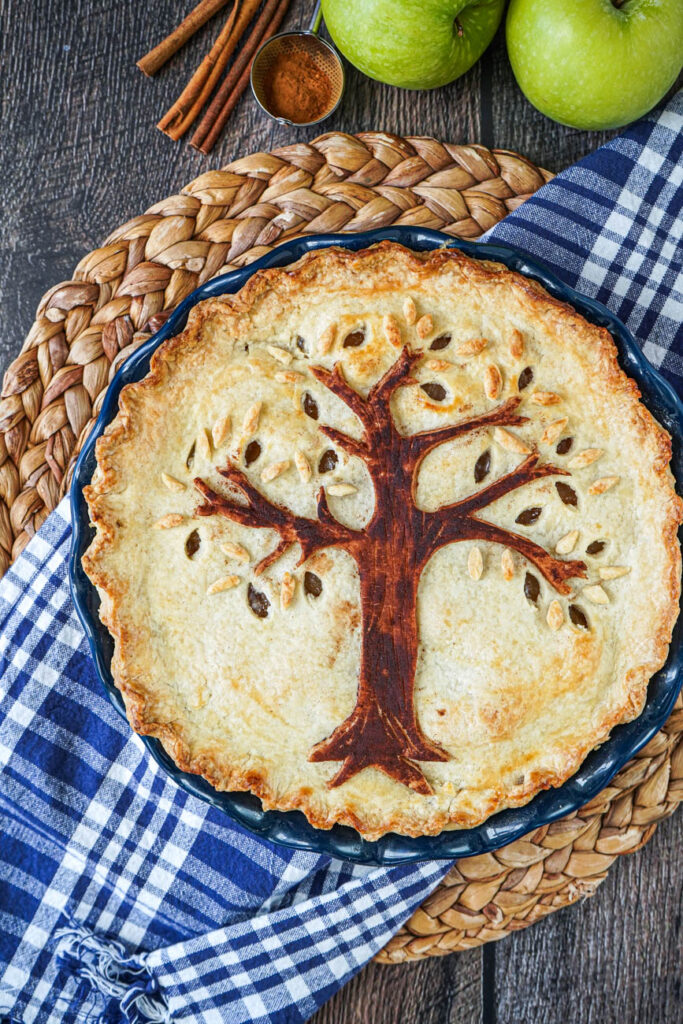
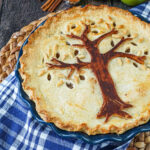
Harvest Tree Pie
To pair with the review, I went with one of the beginner pie shapes. This Harvest Tree Pie requires no glitter, food coloring, or special ingredients!
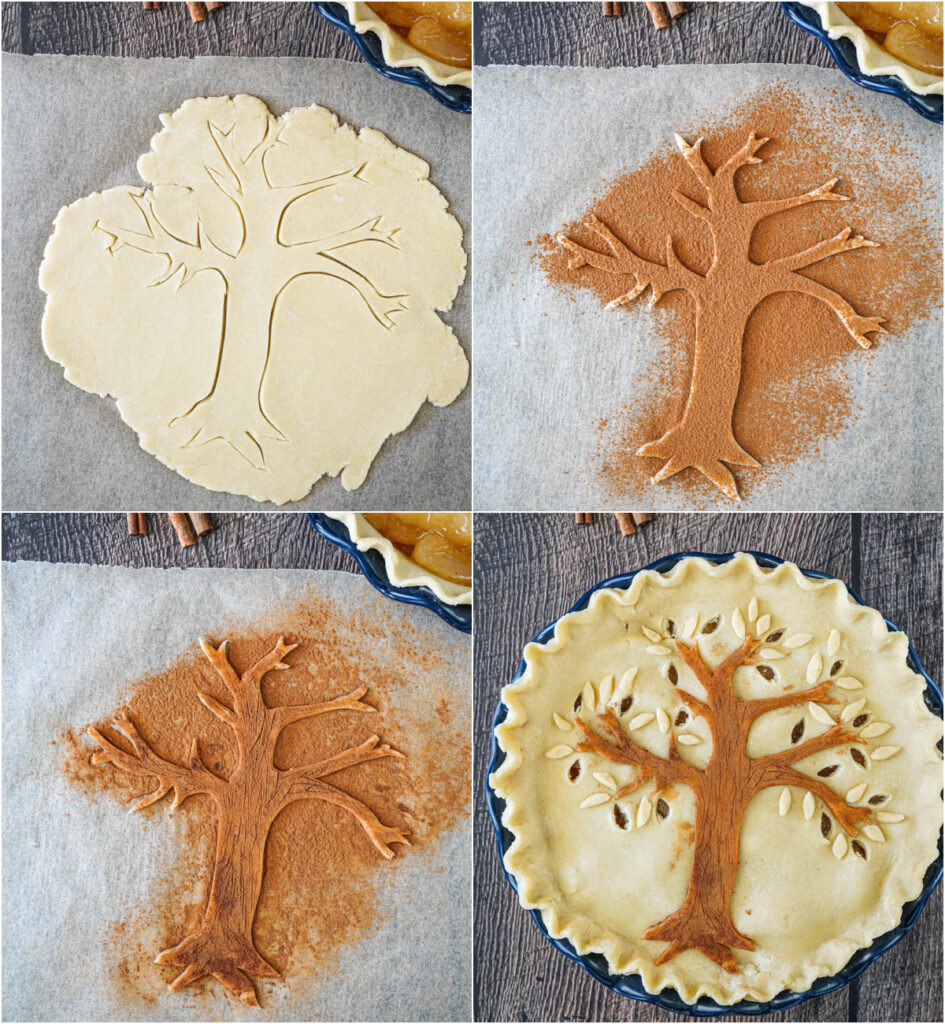
Simply cut your desired pie crust into the shape of a tree (template is provided with the book), brush with egg wash, dust with cinnamon to create the color, then adhere to the top pie crust and cut out/decorate with little leaves.
I was so excited with the results and it is a fun way to dress up a pie for Thanksgiving or throughout the season. Cutting out all the leaves is also perfect practice for older kids.
More Pies
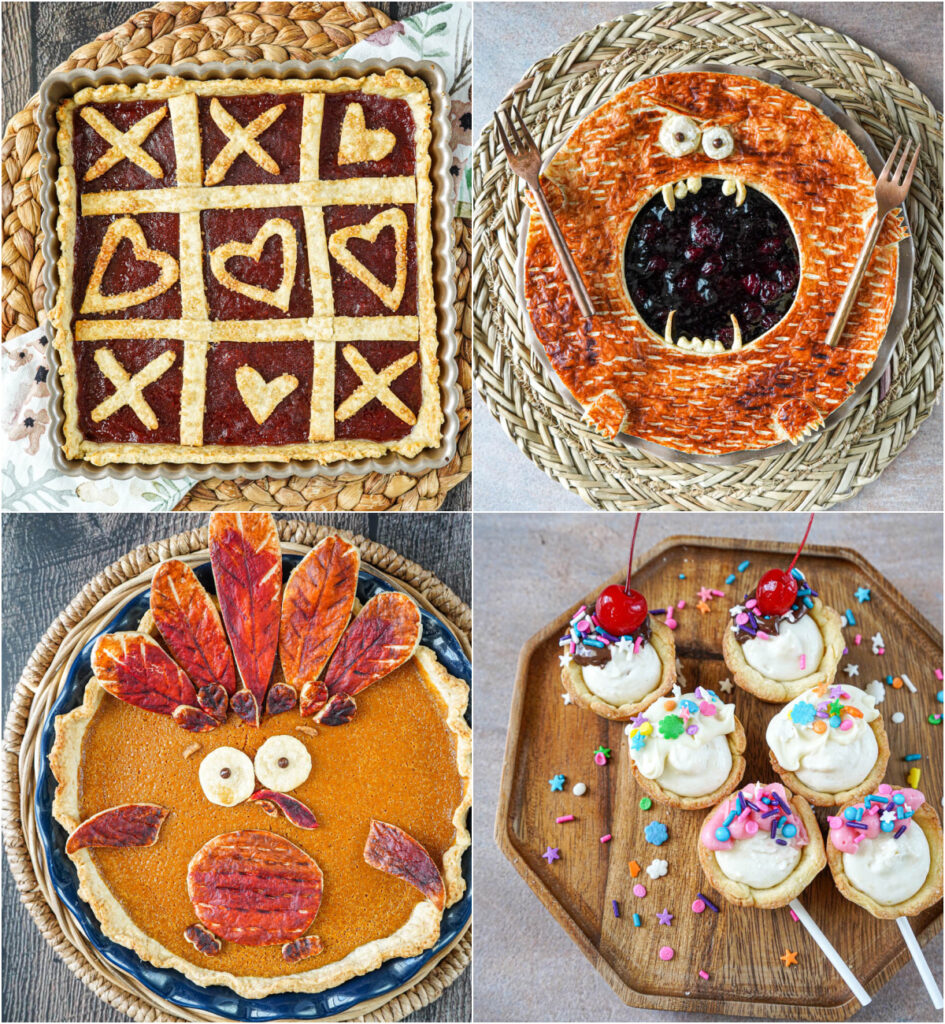
I also made the Tic-Tac-Toe Pie, Monster Mouth Pie, Goofy Turkey Pie, and PieKabobs.
The Tic-Tac-Toe Pie is such a cute idea for Valentine’s Day (or any time of year as far as my daughter is concerned). A red square pie base is topped with a cut out of a tic-tac-toe board with X’s and hearts. It is quite the interactive way to celebrate the holiday.
The Monster Mouth Pie is definitely perfect for Halloween. Developed by Jessica’s son, this pie is topped with a crust decorated to look like a monster with teeth and all.
For Thanksgiving, the Goofy Turkey Pie is great for pairing with a pumpkin, sweet potato, or chess pie. Pieces of pie dough are shaped and colored to make the pieces of a turkey. They are baked separately, then arranged over the base pie shortly after it is removed from the oven.
Jessica created the PieKabobs as an easy way to serve pie in a compact package during parties. I used her recipes for the sweet pie dough and banana cream cheese icebox pie fulling to form these delicious little treats. I love the individual portions and how they are decorated into ice cream sundaes.
Pies Are Awesome is a great pick for those interested in pie art. The pies are labeled from beginner to advanced to help with any skill level. For those avoiding animal products, Jessica has provided vegan options. She has also listed ways to make natural coloring.
Most of the ingredients are readily available in larger supermarkets. Having a store with specialty baking items may be helpful in locating food safe gel colors, candy melts, luster dust, fondant sculpting tools, sanding sugar, pastry brushes, sugar pearls, and more.
Harvest Tree Pie Recipe
Excerpt from Pies are Awesome
Harvest Tree Pie
Ingredients
- 1 1/2 double pie crusts dough of your choice
- Pasteurized egg whites or almond milk if making a vegan pie
- Ground cinnamon or an edible powder of your choice
- Whole egg wash
Instructions
- Roll out enough dough 1/8 inch (3 millimeters) thick on a piece of parchment with your rolling pin to fit the tree template (in book or draw by hand).
- Place the tree template on the dough and cut out the shape with your food-safe precision blade. Remove the template.
- Coat the tree shape in pasteurized egg whites with the pastry brush and sprinkle the ground cinnamon over the top.
- Tap it down with your fingers to ensure good adhesion, and then carefully brush off the excess powder.
- Using your precision blade, score little lines up and down the tree to create the illusion of bark. (You can also use a fondant sculpting tool or a toothpick to do this.)
- Place the tree in the freezer to harden while you work on the rest of the pie.
- Roll out some more dough 1/8 inch (3 millimeters) thick on a piece of parchment paper.
- Lay your pie pan facedown on the rolled-out dough and cut out a circle the size of your pie pan. Coat this dough circle in pasteurized egg whites with the pastry brush.
- Remove the tree from the freezer, and using the offset spatula, carefully place it on the dough circle.
- With your precision blade, cut out little leaf shapes around the branches. Save the cutout shapes!
- Paste the cutout leaf shapes around your branches with pasteurized egg whites until you are happy with the look. Place the top decoration in the freezer.
- Now prepare your base pie as you would for a crimped-edge pie—roll out a sheet of dough 3 inches (7.5 centimeters) larger than your pie pan all around, transfer it to the pan, coat the bottom with egg wash, dock (poke) the dough with a fork, and add desired filling.
- Remove the top decoration from the freezer and carefully place it on the center of your base pie with the cake lifter. Fold over the overhang of dough from the base pie to form a crimped edge.
- Cover the edges of your pie with foil and bake on a baking sheet at 400˚F (200˚C; gas mark 6) for 40 minutes.
- Remove the foil and add some egg wash to the crimped edges, then bake for another 20 minutes, or until the filling has been bubbling for 5 minutes.
Lauren
These pies are so fun!!
SallyBR
Amazing pie, and you worked on so many! Love the review…..