
The Art and Science of Tempura: A Comprehensive Guide to Ingredients, Techniques and Equipment, written by Takashi Nakagawa, Hidemi Sato, and Mitose Tsuchida, is an invaluable resource for making seafood and vegetable-based tempura at home with engaging photography, easy to follow instructions, and detailed charts. A few notable ingredients include Tiger Shrimp, Yellowfin Goby, Sea Urchin, Asparagus, and Kabocha Squash. I will also be sharing a recipe for Lotus Root Tempura inspired by the book.
Disclosure: I received this book from Tuttle Publishing in exchange for my honest review. All comments and opinions are my own.
The Art and Science of Tempura was originally published in Japan as Tempura no Science: Oishisa wo Tsukuridasu Riron to Gijutsu ga Mieru in 2022.
The Authors
Takashi Nakagawa trained for 17 years at Tempura Mikawa in Tokyo and opened his own restaurant, Tempura Nakagawa in Tokyo’s Tsukiji district in 2004.
Hidemi Sato holds a doctorate in food science. She worked in the culinary equipment industry for nine years after graduating from Yokohama International University and completed her Masters and Ph.D. at Ochanomizu University. She is the author of multiple books including The Art and Science of Sushi.
Mitose Tsuchida graduated from Hiroshima University and received her doctorate from Ochanomizu University. She worked as an editor at the Japanese food magazines, Specialty Cooking and Culinary Kingdom, and has written and edited multiple books including The Art and Science of Sushi.
The Art and Science of Tempura
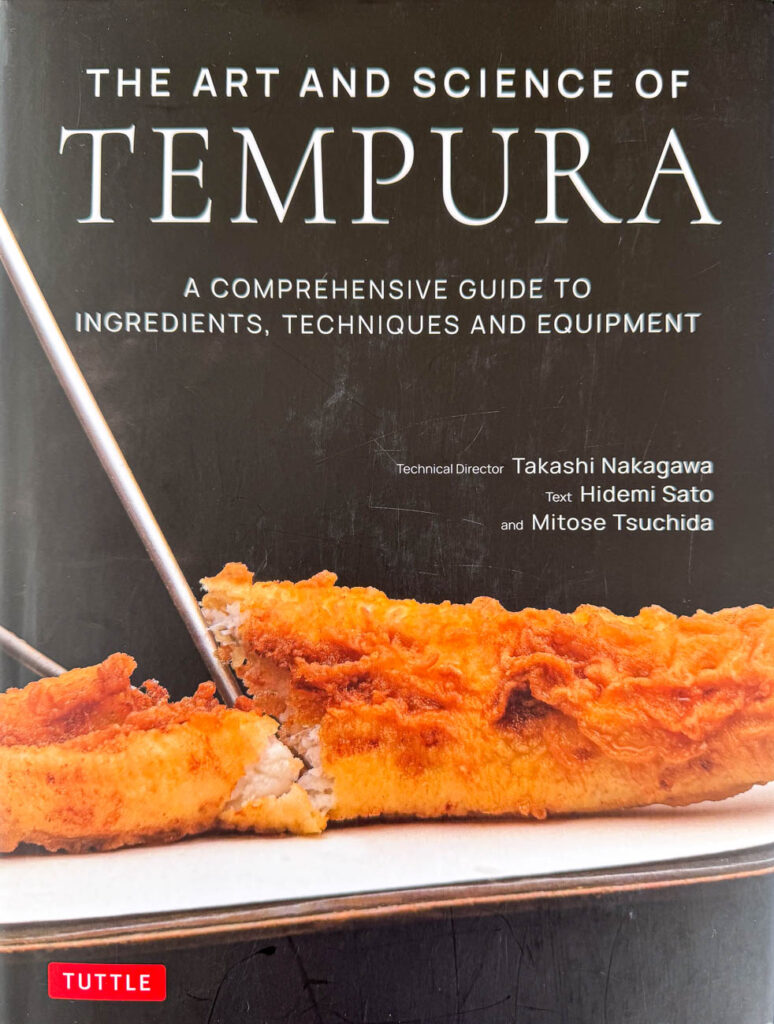
The Art and Science of Tempura begins with an overview of Tempura and its history dating all the way back to the first appearance of tempura-like food in the sixteenth century. I especially appreciated learning about the evolution of tempura over the years and the development of regional variations.
With a focus on the methods used in Chef Takashi Nakagawa’s restaurant, Tempura Nakagawa, the instructions in this book follow the Edomae-style of cooking tempura using ingredients caught in Tokyo Bay and sesame oil for frying.
Within the 224 pages, there are recipes and techniques covering 18 types of local seafood and 17 different seasonal vegetables. Absolutely everything is explained from ingredient prep and folding the paper liner (shikigami) to seasonal calendars and even the scientific analysis of different types of flours and oils and how they affect the final product.
These detailed sections are divided according to the following: The History of Tempura, Tempura Ingredients, Kitchen Tools for Tempura, Ingredient Preparation, The Batter, The Frying Oil, Deep-Frying Techniques, and Kakiage Mixed Fritters. The contents page has a list of the included ingredients with page number for easy reference.
The photography is provided by Ryoichi Yamashita. The introductions to the ingredients and kitchen equipment are paired with large visual guides along with the name in English and Japanese. There are also step-by-step photos for every single technique including butterflying whiting and conger eel, separating abalone, and shelling ginkgo nuts.
In general, there is a focus on the process of handling the ingredients as opposed to a list of recipes. The recipes that are included (for the batter and accompaniments) have a more restaurant-level quantity, but I had no issue using the ratios to divide everything down to a smaller scale. Measurements are listed in ounces/grams and cups/liters.
Lotus Root Tempura
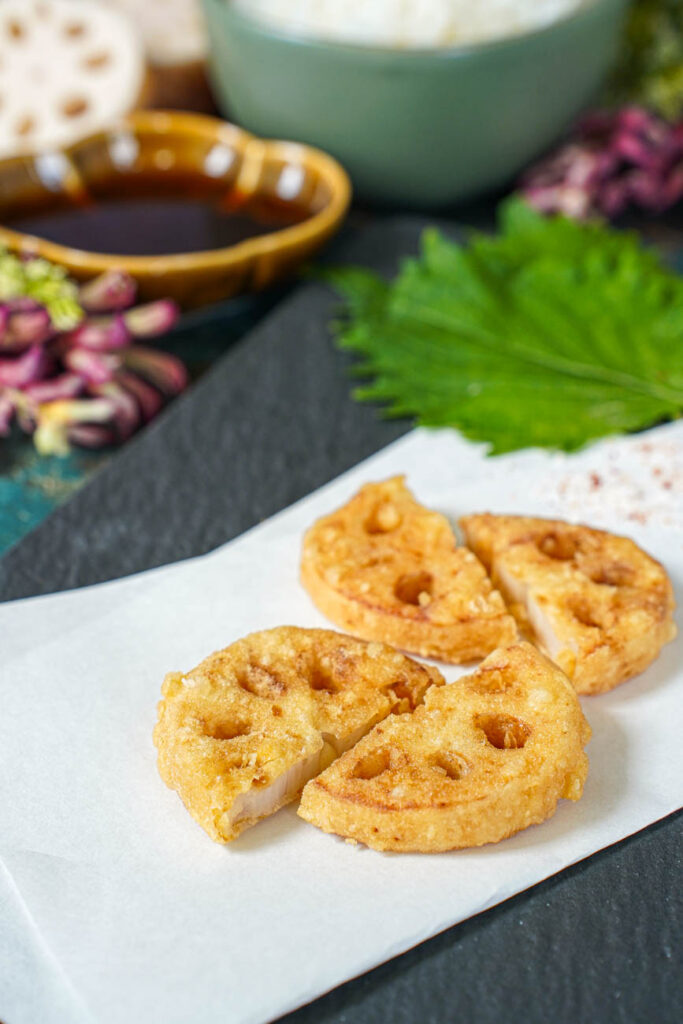
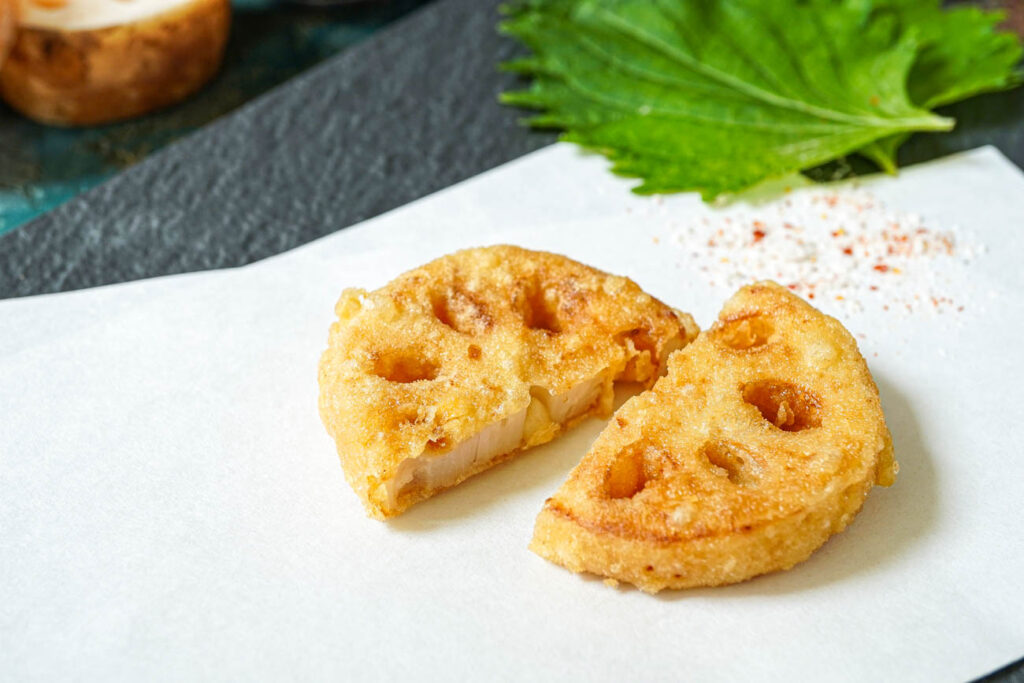
I came across fresh lotus root during a recent visit to Marufuji Japanese Market and was inspired to make Lotus Root Tempura (Renkon no Tempura, れんこんの天ぷら) for the first time! Since The Art and Science of Tempura does not specify exact measurements, I am sharing today’s recipe with an overview of what I personally did at home.
Lotus Root is the underground, underwater stem of the lotus plant. It is made up of around 80 percent starch, creating a crisp, yet fluffy texture with a subtle sweetness. The natural holes through the root also form a very distinctive shape and hold up well to frying, making it a beautiful addition to an assortment of vegetable and seafood tempura.
Start by bringing together the batter, then peel the lotus root and cut into 1/2 inch (1.25 centimeter) thick slices. Lightly dust the cut sides of the lotus root with flour, dip into the batter, and fry until evenly golden on both sides.
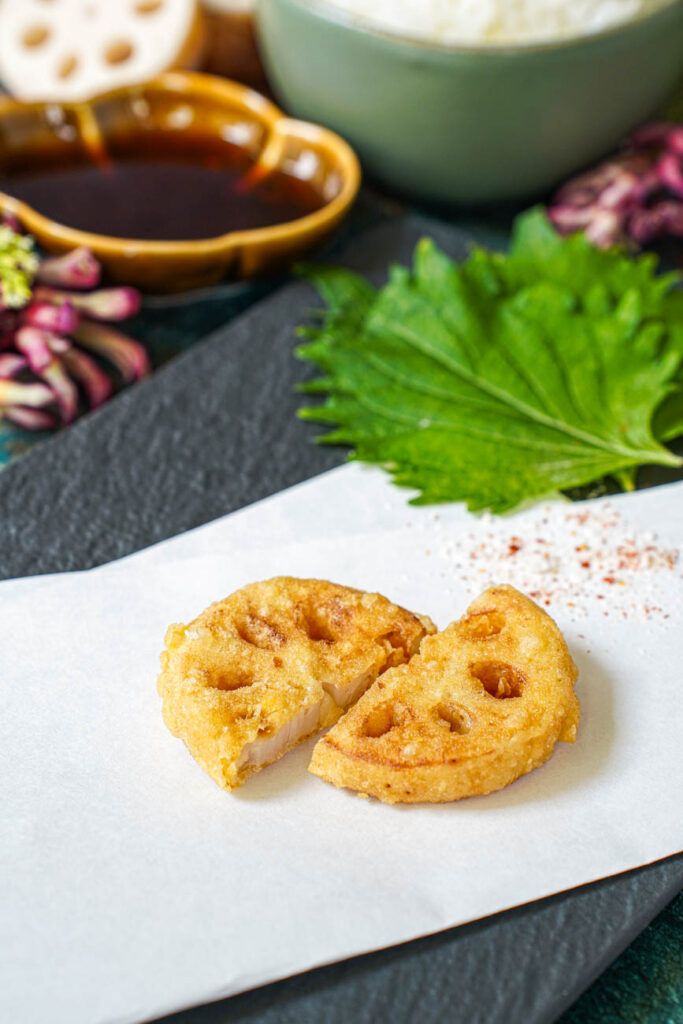
Serve the Lotus Root Tempura with either Tentsuyu (Tempura Dipping Sauce- recipe in book or store-bought) or a sprinkling of salt. For these photos, I mixed some flaky sea salt with ichimi togarashi (ground red pepper) for a little heat. I also like matcha salt and yuzu salt.
A Few Lotus Root Tempura Tips
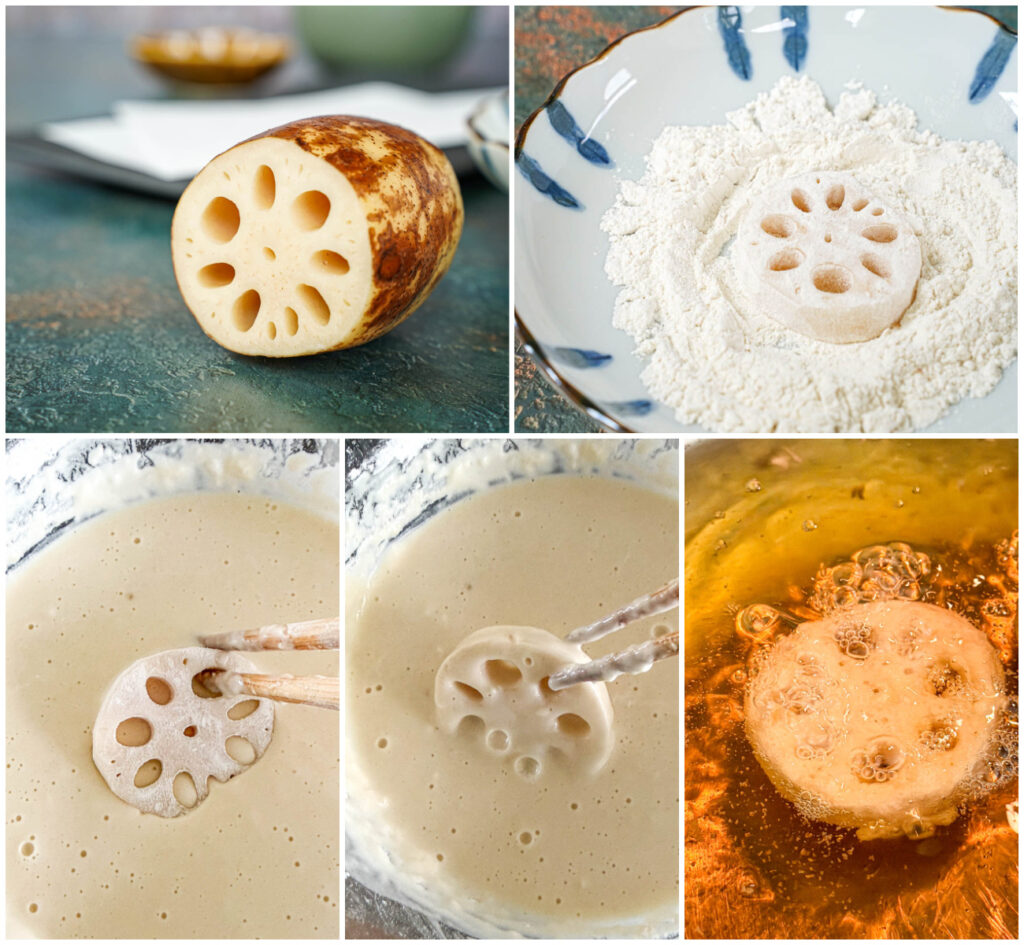
At Tempura Nakagawa, all the ingredients for the batter are well-chilled and refrigerated for at least a day before use.
If using frozen lotus root, defrost in the refrigerator overnight. Peel and slice the lotus root immediately before using. They will start to discolor fairly quickly.
Pat the lotus root slices dry after slicing and coat lightly in flour. This will help absorb any excess moisture when frying and create a more crisp texture in the batter.
Do not bring together the batter until immediately before frying and mix very briefly with chopsticks. Take care to not over-mix or the texture will become too chewy.
I personally like to add a little potato starch/cornstarch to the batter, but it is not used in the book. Omit if desired, but you may need to add a little more flour.
If the batter is too thick when coating the lotus root and fully covering the holes, mix in a little more cold water (not too much!). If too thin to stick, add a little more flour.
Fry the Lotus Root Tempura in a vegetable-based oil with a high smoke point and neutral taste. Tempura Nakagawa uses a blend of refined cottonseed oil and light sesame oil. I personally used rice bran oil with a little sesame.
Add the lotus root to the oil in batches, taking care to not crowd the pan. Bring the temperature of the oil back up to around 350˚F (180˚C), no higher, before frying the next batch. If the oil is too cold, the slices will soak in the oil and not become tender. If too hot, the batter will brown before the interior gets a chance to cook through.
Use a slotted spoon or skimmer to remove the pieces of batter that accumulate in the oil during frying before they become too dark. These fried pieces (tenkasu) can be saved for future use such as sprinkling on noodles like this Hiyashi Tanuki Udon, topping sushi, or other dishes.
More Tempura
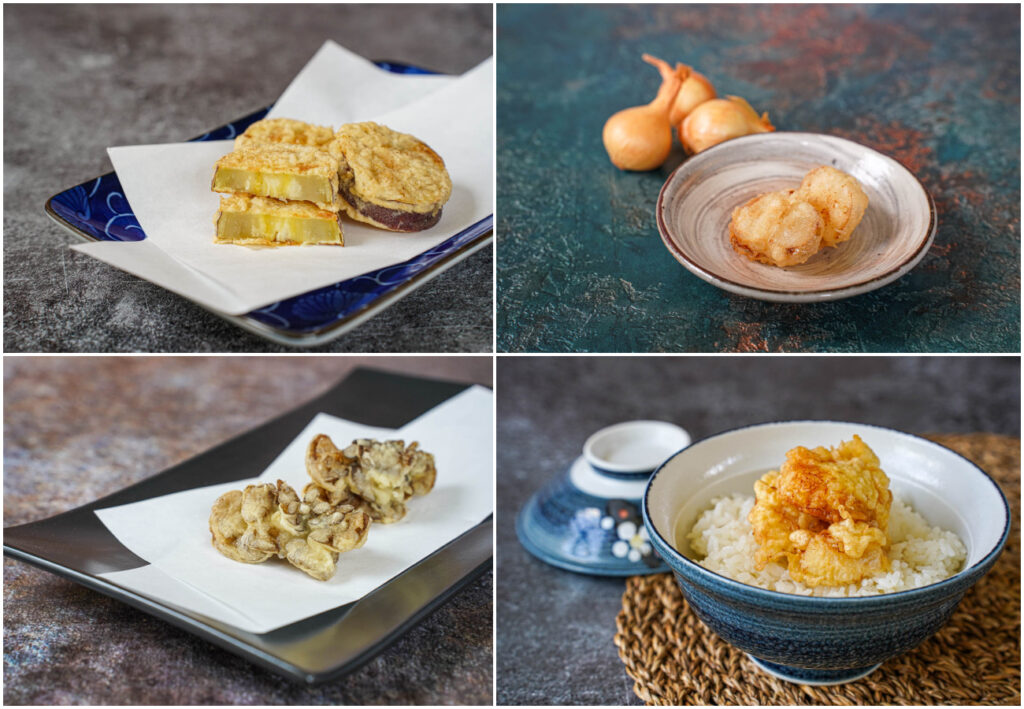
I also made Sweet Potato Tempura, Pearl Onion Tempura, Maitake Mushroom Tempura, and Scallop Kakiage.
For the Sweet Potato Tempura, thick slices of Japanese sweet potato (they use the Beniazuma variety) are lightly dusted in flour, coated in the batter, and fried until golden. The result is a thin, crisp coating with a tender, fluffy interior. I also appreciated the notes for storing sweet potatoes longterm through a traditional curing process.
The Pearl Onion Tempura was my personal favorite. Each onion is cut in half with the cut side dusted with flour. After coating in the batter, they are slowly fried until lightly golden to create sweet and crunchy little bite size pieces.
The Maitake Mushrooms were another favorite with quite the notable presentation. Also known as “hen of the woods,” maitake mushrooms have a petal-like cap perfect for capturing a thin coating of the batter.
The Scallop Kakiage is definitely one of the more challenging options in the book. The scallops are fried in a cluster with a thicker batter to make Kakiage in the same style as served at Tempura Nakagawa. This creates a fantastic contrast in texture between the crisp, delicate batter and medium-rare scallop pieces. We served them over rice with a Tendon Sauce (recipe in book).
The Art and Science of Tempura is an incredible pick for both beginners and more advanced cooks wanting a comprehensive guide for making tempura at home. This book covers everything from basic kitchen equipment and prepping ingredients to making adjustments to the batter and frying in different types of oil. Once you have the process down, many of the options come together in less than 30 minutes for a restaurant-worthy meal in the comfort of your own kitchen.
Having a Japanese market nearby will be helpful in locating notable fresh seafood and specialty vegetables. For those in Northern Virginia, I was able to find many of these ingredients at Marufuji in Vienna. While living in Los Angeles, I would go to Mitsuwa or Tokyo Central in Torrance.
Lotus Root Tempura Recipe
Adapted from The Art and Science Tempura
Lotus Root Tempura
Ingredients
- vegetable oil for deep-frying, Tempura Nakagawa uses a blend of refined cottonseed oil and light sesame oil
- 3/4 cup (180 milliliters) cold water
- 1 large egg yolk cold
- 3/4 cup (90 grams) cake flour plus more for dusting, ideally refrigerated overnight
- 2 tablespoons (15 grams) potato starch or cornstarch
- 1 pound (450 grams) fresh lotus root
Instructions
- Pour the oil in a large saucepan or wok to about 2 inches (5 centimeters) deep and heat to 350˚F (180˚C).
- In a large bowl, beat together the water and egg yolk until frothy.
- Sift in the flour and cornstarch. Stir until just combined, but not completely smooth, no more than a minute and ideally no more than 30 seconds.
- Peel the lotus root and cut crosswise into 1/2 inch (1.25 centimeter) thick slices. Use a towel to wipe away moisture.
- Dust the cut sides of the lotus root slice lightly in flour, then dip in the batter to coat, allowing any excess to drip off and making sure the holes are not covered. Transfer immediately into the heated oil.
- If the batter is too thick when coating the lotus root, mix in a little more cold water. If too thin and falling off, mix in a little more flour.
- Fry, turning occasionally, until golden on both sides, 4-5 minutes, then transfer to a towel-lined plate or rack. Remove any small leftover fried pieces of tempura batter as well.
- Repeat with remaining lotus root slices, letting the oil get back to 350˚F (180˚C) between batches.
- Serve immediately with Tentsuyu (Tempura Dipping Sauce) or a sprinkling of salt.
Leave a Reply