
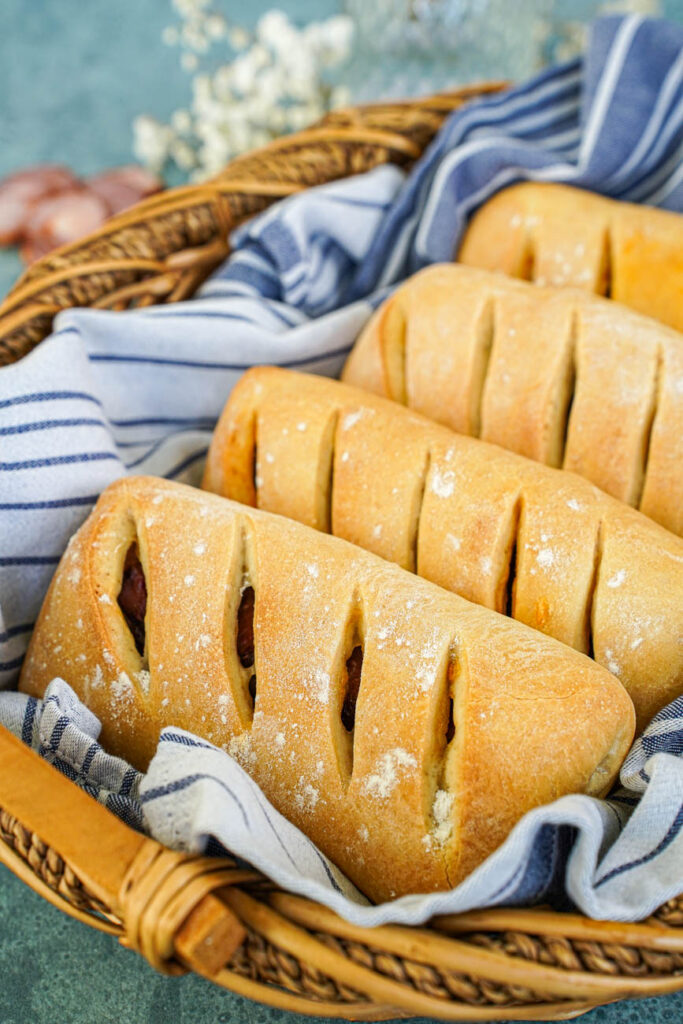
A recipe for Pão com Chouriço (Portuguese Chouriço Bread)! These yeast-based bread rolls are filled with thin slices of chouriço and baked until golden.
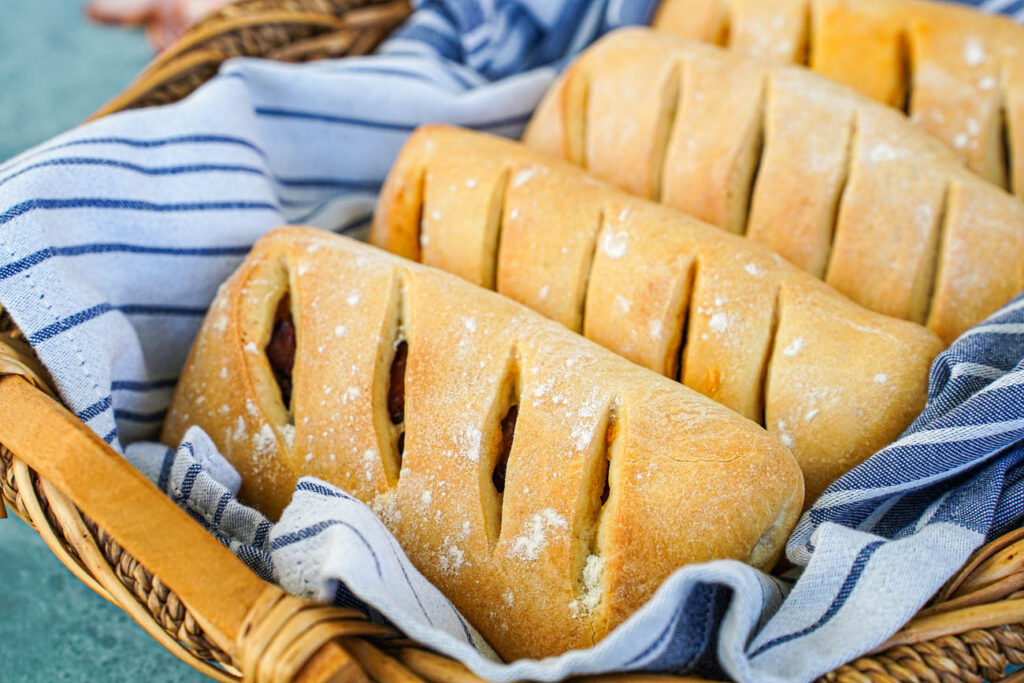
I first came across the inspiration for Pão com Chouriço after seeing a version in the book, My Lisbon. It is such a comforting way to use up leftover chouriço and perfect as an afternoon snack.
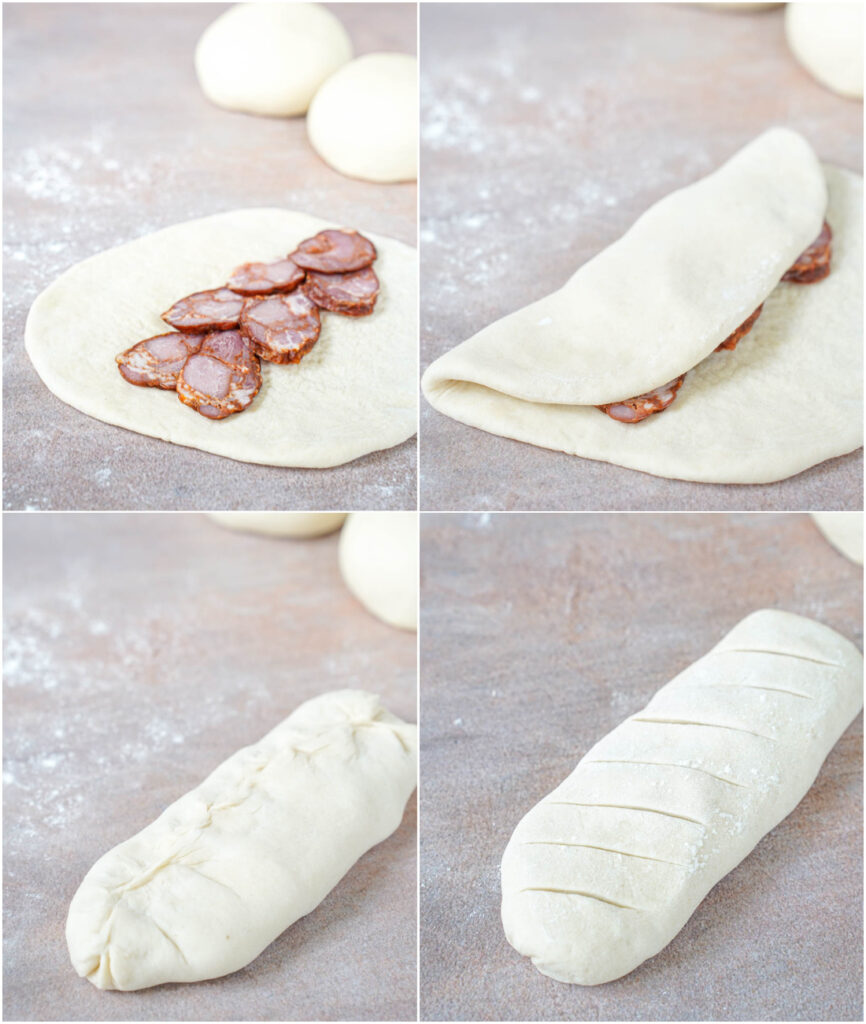
Start by making the yeast-based dough and allow it to rest at room temperature until doubled. Form into individual rounds and rest again before rolling each round into a thin sheet, filling with chouriço slices, and shaping into elongated rolls.
Following a final rest, bake the rolls first at 450˚F (230˚C), then at 425˚F (220˚C), until golden brown with a thin and crispy crust giving way to a soft, chewy center. The smoky, paprika-infused chouriço slices across the center creates a wonderful burst of flavor in every bite.
These Pães com Chouriço are best served warm, but will last for up to a day.
Once cooled fully to room temperature, I generally store any leftovers in the freezer in an airtight freezer-safe bag as a last minute snack- either reheat straight from the freezer in a 350˚F (180˚C) oven for a few minutes or in a microwave- not recommended, but I have done it a time or two- for a few seconds.
Chouriço
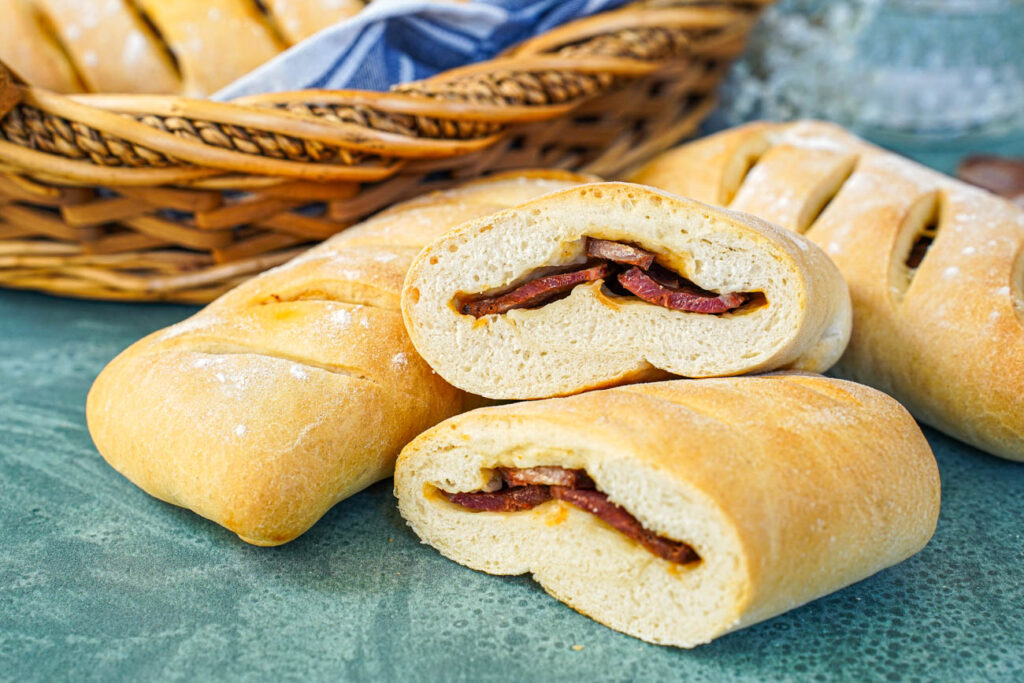
Chouriço is a type of sausage made from pork seasoned with wine, paprika, and salt. It can be found in markets with Portuguese ingredients and some specialty deli/cheese shops.
For those in the DC area, I was able to find it at European Foods Imports Exports in Arlington, Virginia.
The Chouriço I used didn’t have a skin, but remove it if it does before cutting into slices. You can also sometimes find Chouriço already cut into extra-thin slices. These would work especially well to create a more swirled pattern in the bread.
A Few Pão com Chouriço Tips
When adding the yeast to the water, make sure the water isn’t too hot or it will damage the yeast. The temperature should be about 105˚F (40˚C)- just warm enough to activate the yeast.
Do not pack in the flour when measuring or you may end up with too much. To measure flour, gently spoon it into the measuring cup and level with a knife without pressing down. The most accurate way to measure is by weight.
Knead the dough until smooth and elastic. If too crumbly, add a little more warm water at a time. Only add a little more flour if too sticky to handle. Too much flour will create a tougher bread.
The dough should be doubled in size before forming into the individual rolls and transferring to the pan. This usually takes about 1-2 hours in my kitchen. In warmer rooms, it may take 1 hour or closer to 2 during the winter.
I personally cut a chouriço link into thin slices and arranged them along the base of the bread before folding into thirds. I have also seen the bread rolled with the chouriço slices to create more of a swirl or even the chouriço diced into smaller pieces.
In My Lisbon, Nuno also included chopped walnuts for a bit of a crispy contrast from the chouriço slices.
Placing the pan of hot water on the bottom shelf of the oven will help develop a thin, crispy crust on the bread rolls as they bake.
Looking for more Portuguese Recipes?
Try my:
Pão com Chouriço (Portuguese Chouriço Bread) Recipe
Adapted from My Lisbon
Pão com Chouriço (Portuguese Chouriço Bread)
Ingredients
- 2 1/4 teaspoons (7 grams) active dry yeast
- 1 1/4 cups (300 milliliters) lukewarm water 105-115˚F (40-46˚C)
- 4 cups (500 grams) bread flour plus more for dusting
- 1 teaspoon fine salt
- 2 tablespoons (30 milliliters) olive oil
- 7 ounces (200 grams) Chouriço cut into thin slices
Instructions
- In a small bowl, sprinkle the yeast over the lukewarm water. Stir briefly and allow to sit at room temperature until frothy, about 10 minutes.
- In the bowl of a stand mixer fitted with a dough hook or a large bowl, combine the flour and salt.
- Mix in the water with the frothy yeast and the olive oil to bring together the dough. If too stiff and crumbly, mix in a little more water. If too wet and sticky to handle, lightly add a little more flour.
- Knead the dough on a lightly floured surface until soft and elastic.
- Place the dough in a large bowl, cover, and allow to rest at room temperature until doubled, 1-2 hours.
- Divide the dough into 6 equal pieces. Form each into a ball, place on a work surface lightly dusted with flour, cover with a cloth, and rest at room temperature for 30 minutes to 1 hour.
- Line two rimmed baking sheets with parchment paper or lightly grease.
- Place one ball on a work surface, keeping the others covered, and roll into a square about 6 x 6 inches (15 x 15 centimeters).
- Arrange a layer of chouriço slices down the center third of the square. Fold one side over the chouriço layer, then the other side over to create three layers of dough. Pinch together the seam and ends to seal.
- Place the roll on the prepared baking sheet, dust the top with flour, and make a few diagonal slits across the top with a sharp knife.
- Repeat with the remaining dough, placing them at least 2 inches (5 centimeters) apart.
- Cover the rolls with a towel and set aside at room temperature for 30 minutes.
- Preheat the oven to 450˚F (230˚C) with one rack in the center and another rack towards the bottom.
- Place a pan of water on the bottom rack.
- Once heated, place a baking sheet in the oven and bake the rolls for 5 minutes.
- Reduce the heat to 425˚F (220˚C), open the door briefly for 10 seconds to release steam, and continue to bake until golden, about 15-20 minutes. Repeat with the remaining baking sheet, increasing the heat back to 450˚F (230˚C) and adding more water to the pan, if needed, before baking.
- Transfer to a wire rack and allow to cool for about 10 minutes before serving.
Lorraine Hover
This bread is so delicious! I’m glad that you shared this, it is an added joyful taste to add depth to our meals.